Setting up your workstation
This first guide will walk you through a step-by-step installation of the required tools to start developing applications on Symbol.
We will be using the test network, which uses the same technology and features of the future main public network.
The testnet allows developers to experiment with the offered Symbol’s transaction set in a live network without the loss of valuable assets.
Note
Not a developer? Download our client to manage XYM and issue transactions.
Creating an account
An account is a deposit box where you can hold mosaics (tokens) and interact with them by announcing transactions.
We are creating a new account with the Symbol CLI, a command-line tool designed to architect solutions and interact with Symbol networks in an efficient manner.
- Symbol CLI requires Node.js 12 LTS to execute. Open a new terminal and check the version installed with:
If you get an error or the version returned does not match v12.X, visit nodejs.org to install the requirement.
- To install Symbol CLI, run the next command.
npm install --global symbol-cli@0.20.2
- Then, generate a new account and save it as a profile.
symbol-cli account generate

Enter network type (MIJIN_TEST, MIJIN, MAIN_NET, TEST_NET): TEST_NET
Do you want to save the account? [y/n]: y
Select an import type: » PrivateKey
Enter Symbol Node URL. (Example: http://localhost:3000): http://api-01.us-east-1.096x.symboldev.network:3000/
Insert the profile name: testnet
Do you want to set the account as the default profile? [y/n]: y
- If everything goes well, you should see the account credentials displayed in the terminal.
Profile stored correctly
┌─────────────┬──────────────────────────────────────────────────────────────────┐
│ Property    │ Value                                                            │
├─────────────┼──────────────────────────────────────────────────────────────────┤
│ Address     │ TCWYXK-VYBMO4-NBCUF3-AXKJMX-CGVSYQ-OS7ZG2-TLI                    │
├─────────────┼──────────────────────────────────────────────────────────────────┤
│ Public Key  │ 203...C0A                                                        │
├─────────────┼──────────────────────────────────────────────────────────────────┤
│ Private Key │ AAA...AAA                                                        │
└─────────────┴──────────────────────────────────────────────────────────────────┘
Note
Make sure to keep the private key secret and backed up safely somewhere offline.
If you get the error The CLI cannot reach the node, the most common causes are:
- Incorrect node URL: The URL used does not belong to an active node. Open the URL provided in a new browser tab and check if you get a response. If the test network node is not working, you can use another node url from this list or run your testnet node by following the next guide.
- Internet connection: The CLI resolves some values from the node. If you decide to use the tool without being connected to the internet, you will have to pass the options
--network, --generation-hash, --namespace-id, and divisibility. Type symbol-cli account generate --help to know more about each parameter.
Getting test currency
To announce a transaction, the sender should pay a fee to provide an incentive to those who validate and secure the network and run the infrastructure.
This cost is paid in symbol.xym mosaics, the default network currency of the public network.
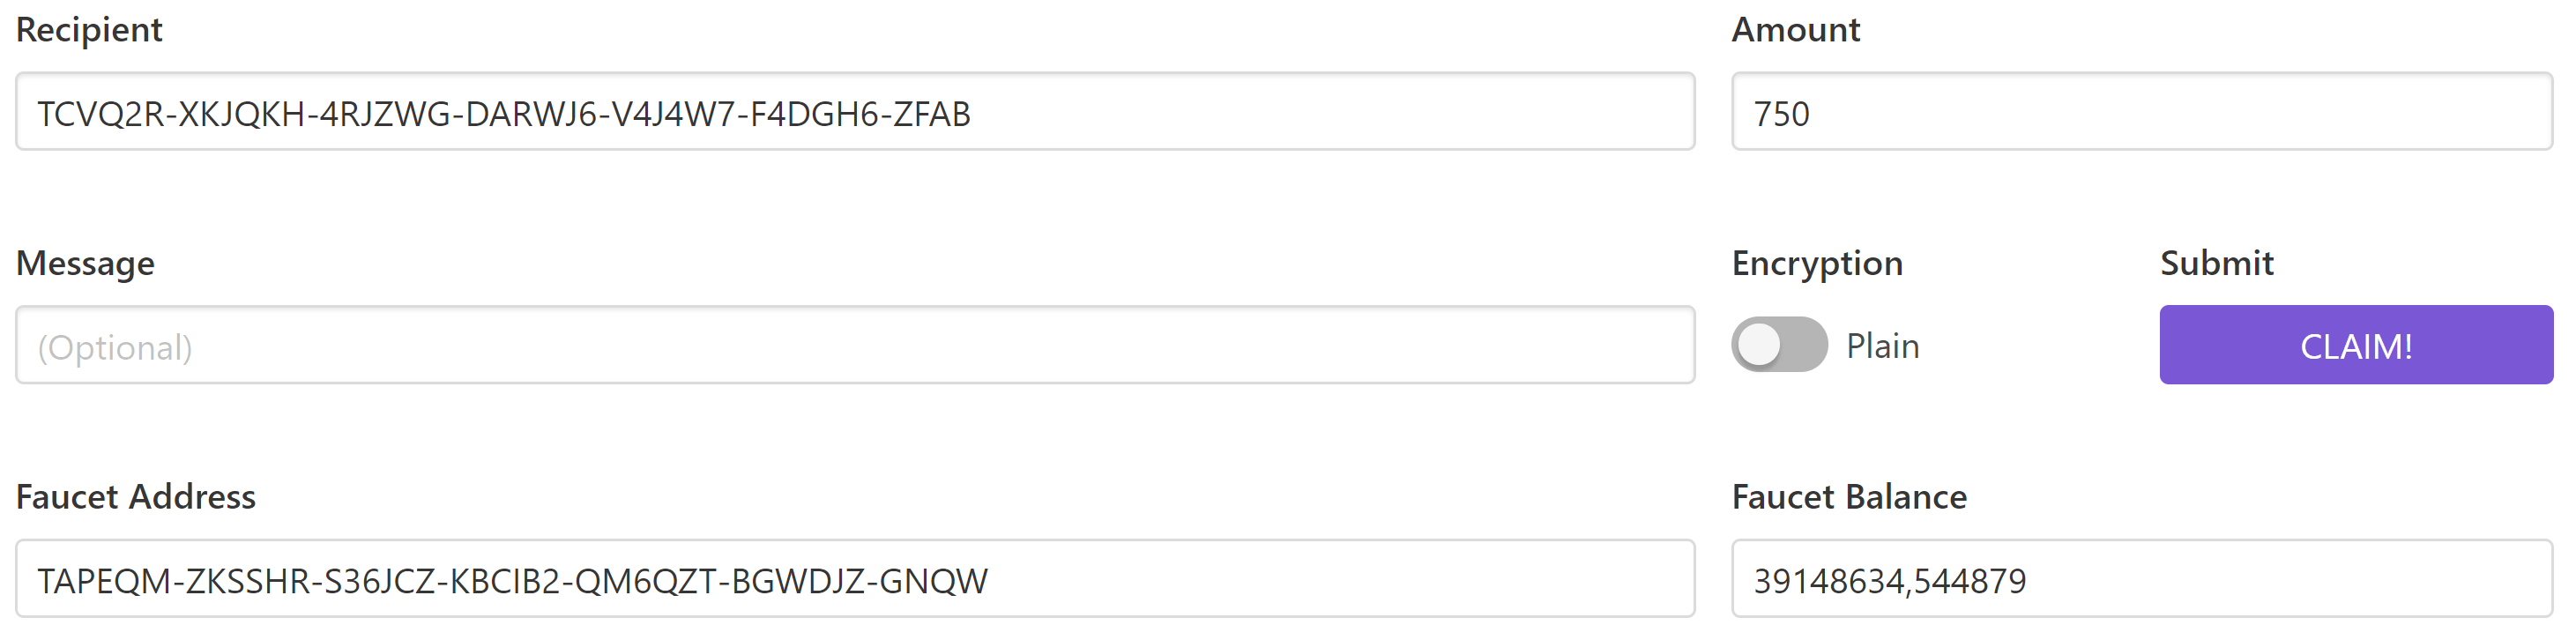
Now that you have created your first account, let’s request symbol.xym units from the testnet faucet.
Navigate here, indicate the amount of symbol.xym you want to receive and the address, and click “CLAIM!”.
After the transaction gets confirmed, check if your account has received symbol.xym using the command-line tool.
symbol-cli account info --profile testnet

Balance Information
┌──────────────────┬─────────────────┬─────────────────┬───────────────────┐
│ Mosaic Id        │ Relative Amount │ Absolute Amount │ Expiration Height │
├──────────────────┼─────────────────┼─────────────────┼───────────────────┤
│ 5E62990DCAC5BE8A │ 750.0           │ 750000000       | Never             │
└──────────────────┴─────────────────┴─────────────────┴───────────────────┘
Note
The faucet has a limited amount of symbol.xym and must be replenished before it dries. If you don’t need your test symbol.xym units anymore, please send them back to the account TA6W43-2Q3NHN-Q5HQSK-Q52XL7-MFJZQI-TJRYBI-LQGG.
Creating a project
Now that you have your account filled with symbol.xym units, it is the time to choose a programming language.
Pick the one you feel most comfortable with, or follow your project requirements.
Then, create a folder for your new project and run the instructions for the selected language.
If none of the languages fits your project, you can always query the blockchain directly using the REST gateway.
Note
Symbol SDK require Node.js 12 LTS to execute.
- Create a
package.json file.
- Install Symbol SDK and RxJS library.
npm install symbol-sdk@0.20.6 rxjs
- Install globally TypeScript dependency:
npm install --global typescript
typescript --version
- Install ts-node to execute TypeScript files with node.
sudo npm install --global ts-node
Note
Symbol SDK requires Node.js 12 LTS to execute.
- Create a
package.json file.
- Install Symbol SDK and RxJS library.
npm install symbol-sdk@0.20.6 rxjs
Note
Symbol SDK requires JDK 8 to execute.
- Open a new Java gradle project. Use your favourite IDE or create a project from the command line.
gradle init --type java-application
- Edit
build.gradle to use Maven central repository.
repositories {
    mavenCentral()
}
- Add
symbol-sdk as a dependency.
dependencies {
    compile "io.nem:symbol-sdk-vertx-client:0.20.2"
}
- Execute
gradle build and gradle run to run your program.
Continue: Writing your first application.